 RSS Feed
 Twitter
 8:51 AM
 Unknown


I am a big fan of the Game of Thrones book series, but, let's be honest, sometimes you want something lighter and a little less...behead-y. Melissa de la Cruz's new book The Ring and The Crown brings royal fun and lightness to a world where magic meets politics and duty clashes with love. The book has aptly been dubbed "Glam of Thrones," after the four glamorous girls at the center of the plot. Today, I've teamed up with The Ring and The Crown to bring you this bejeweled nail art inspired by the royal luxury of the book.
Read on to learn how to turn your nails into jewels fit for a queen!

I read the book and was inspired by how important gems and precious stones were in the world. Besides using them for royal adornment, each stone had a different purpose, a different power. Make each of your nails a different colored gem and invoke the power of them all!
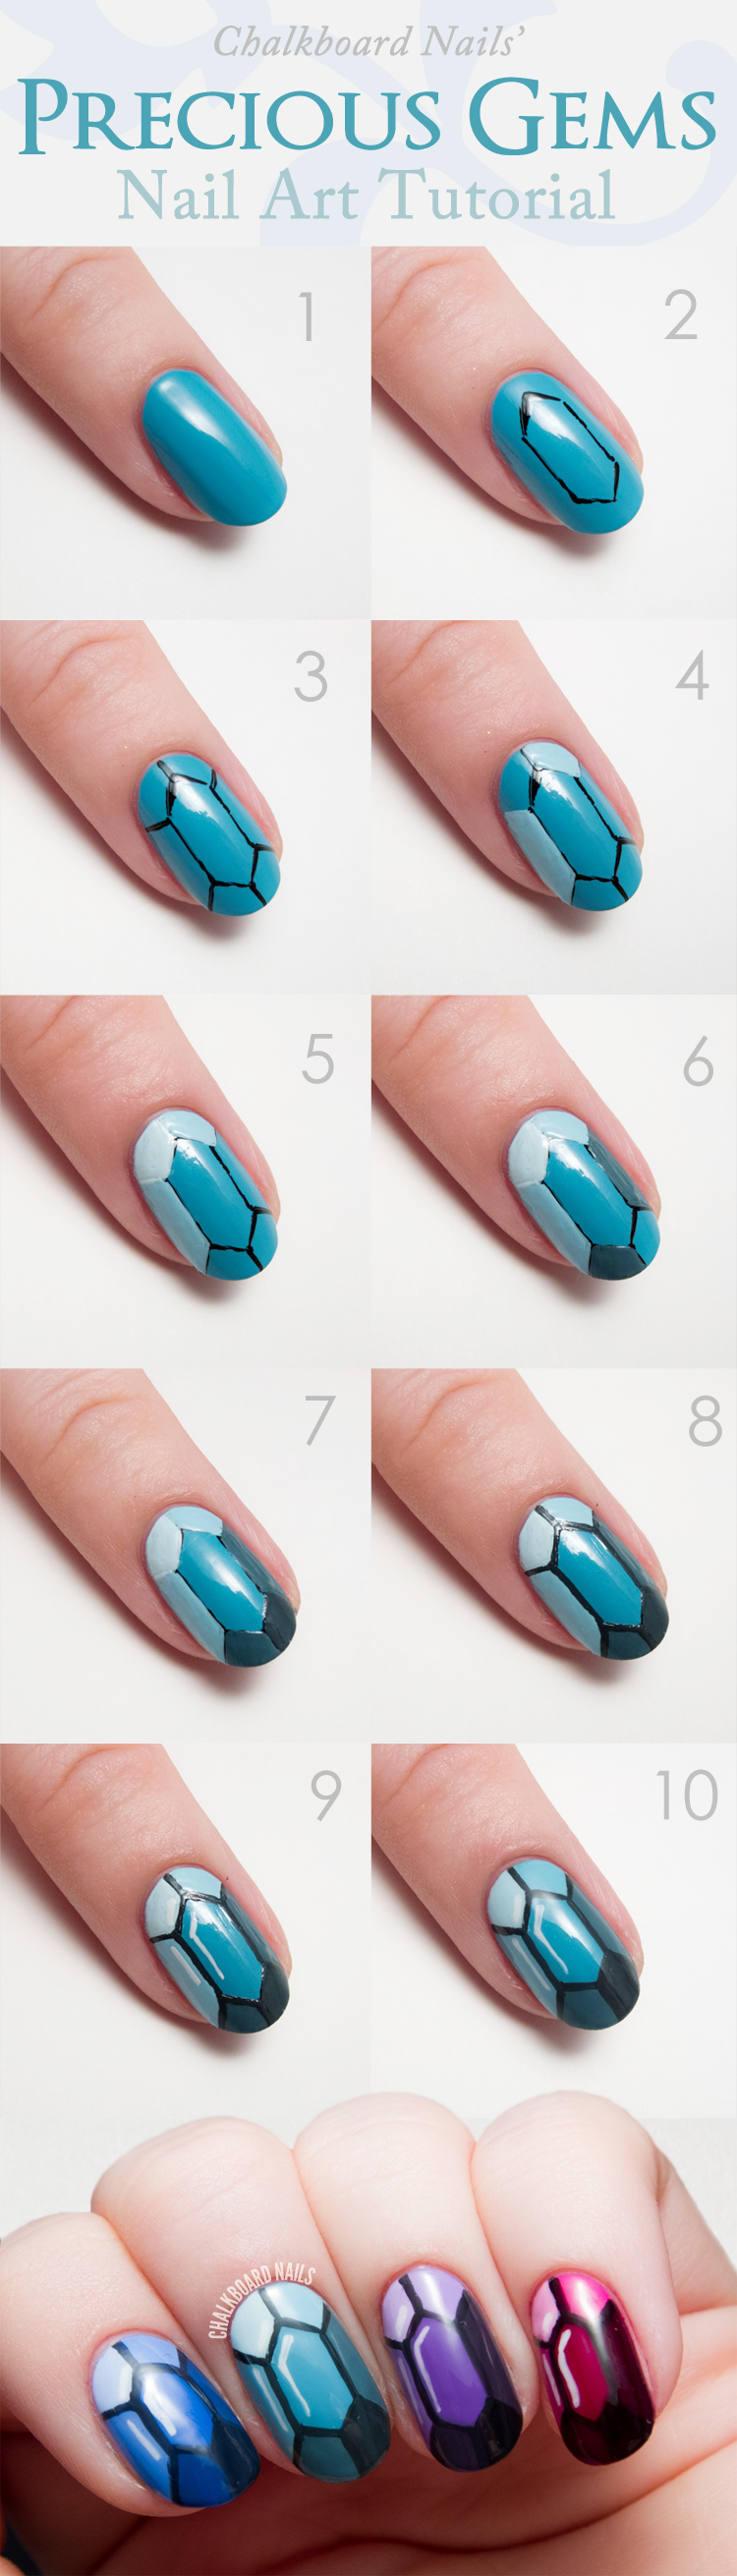
GET THE LOOK:
- Paint your nail with a nail polish in a medium jewel tone.
- Using a nail art brush or a toothpick and contrasting nail polish, lightly sketch out a oblong hexagon down the length of your nail. Don't worry about being too precise here, this is just a guide!
- Add facet lines from each point of the hexagon outwards towards the edges of your nail.
- Working on a piece of tinfoil or wax paper, mix three drops of your base polish with one drop of white nail polish. Fill in the left and top right spaces with your newly mixed shade.
- Mix one drop of your base polish with three drops of white nail polish. Fill in the top left space with this shade.
- Mix five drops of your base polish with a tiny drop of black nail polish. Fill in the bottom left and right spaces with this shade.
- Mix four drops of your base polish with one drop of black nail polish. Fill in the bottom right space with this shade.
- Using your shade from step seven, outline the facets. If the polish starts to thicken, mix more to avoid lumpiness.
- Add some highlights to your gem with white nail polish.
- Finish with topcoat for seal and shine.
I used: Sally Hansen Pacific Blue, Misa Blue Jade Vine, Misa Loveliest of Lilacs, CoverGirl Wine to Five, Sally Hansen Going Green
TIP: If you are having trouble with this design, try using acrylic paint instead of nail polish! It is easier to handle and doesn't dry out as quickly. Just be sure to put down a coat of nail polish first and finish the design with topcoat.


Whether you are going to the ball of the season or you just have a date with a good book, I hope that this bold and fun nail art will make you feel extra special.
The Ring and The Crown is available now. Visit the official website for more information.
This post is sponsored by The Ring and The Crown. All opinions are my own.


